
Up to date tutorials and information on Macros can be found on http://gameboymacro.com/
Items you will need:
- Nintendo DS Lite
- Rosin core solder
- Soldering Iron
- Hot Glue Gun
- Tri-wing Screw Driver
- Small Phillips head screw driver
- 330 OHM 0805 Surface Mount Resistor (or standard 330OHM resistor though this tutorial focuses on using a SMT resistor)
- 30 Guage Kynar Wire
- Tweezers (optional but recommended)
Step 1 – Opening the DS
First, turn the DS over, remove the battery cover and then remove the screws marked in red.


Once these screws have been removed you can pry the DS case open. It is a bit of a pain, but remove the bottom first, leave it so the bottom screen is laying face down or else you risk damaging the ribbon cable.
Start at right side and slowly pry around to the left side until you can lift it up. Lift it up slowly, the springs in the L and R buttons may pop out.
Once open, remove the screws and disconnect the cables marked in red. Then remove the Wifi/Bios module (marked in blue).
Note: It may be difficult to remove the wifi antenna (black). You can try to feed it through the DS slot, but it will probably get caught on something. Since we’re not going to need it I usually just cut it off.

There is some double sided tape holding the right side of the bios module down, so it will be slightly tough to remove
Next, you need to disconnect the digitizer ribbon cable, the connector is VERY fragile. Lift it up from the bottom with a tooth pick or something similar

Now, push the touch screen from the outside and lift the motherboard out. You can flip the motherboard up from the bottom and rest it on the table (see below). Then disconnect the ribbon cables marked. Then remove the screws marked.


Step 2 – Soldering the resistor
Now you can remove the top half of the shell from the board and remove the touch screen. Feed the ribbon cable through the slit like you see below. If you have no plans of using the top screen then you could also just cut the cable.

You now need to solder the 330 OHM SMT resistor (or resistor of your choice) to the points marked below. LEDC2 and LEDA2. Orientation does not matter
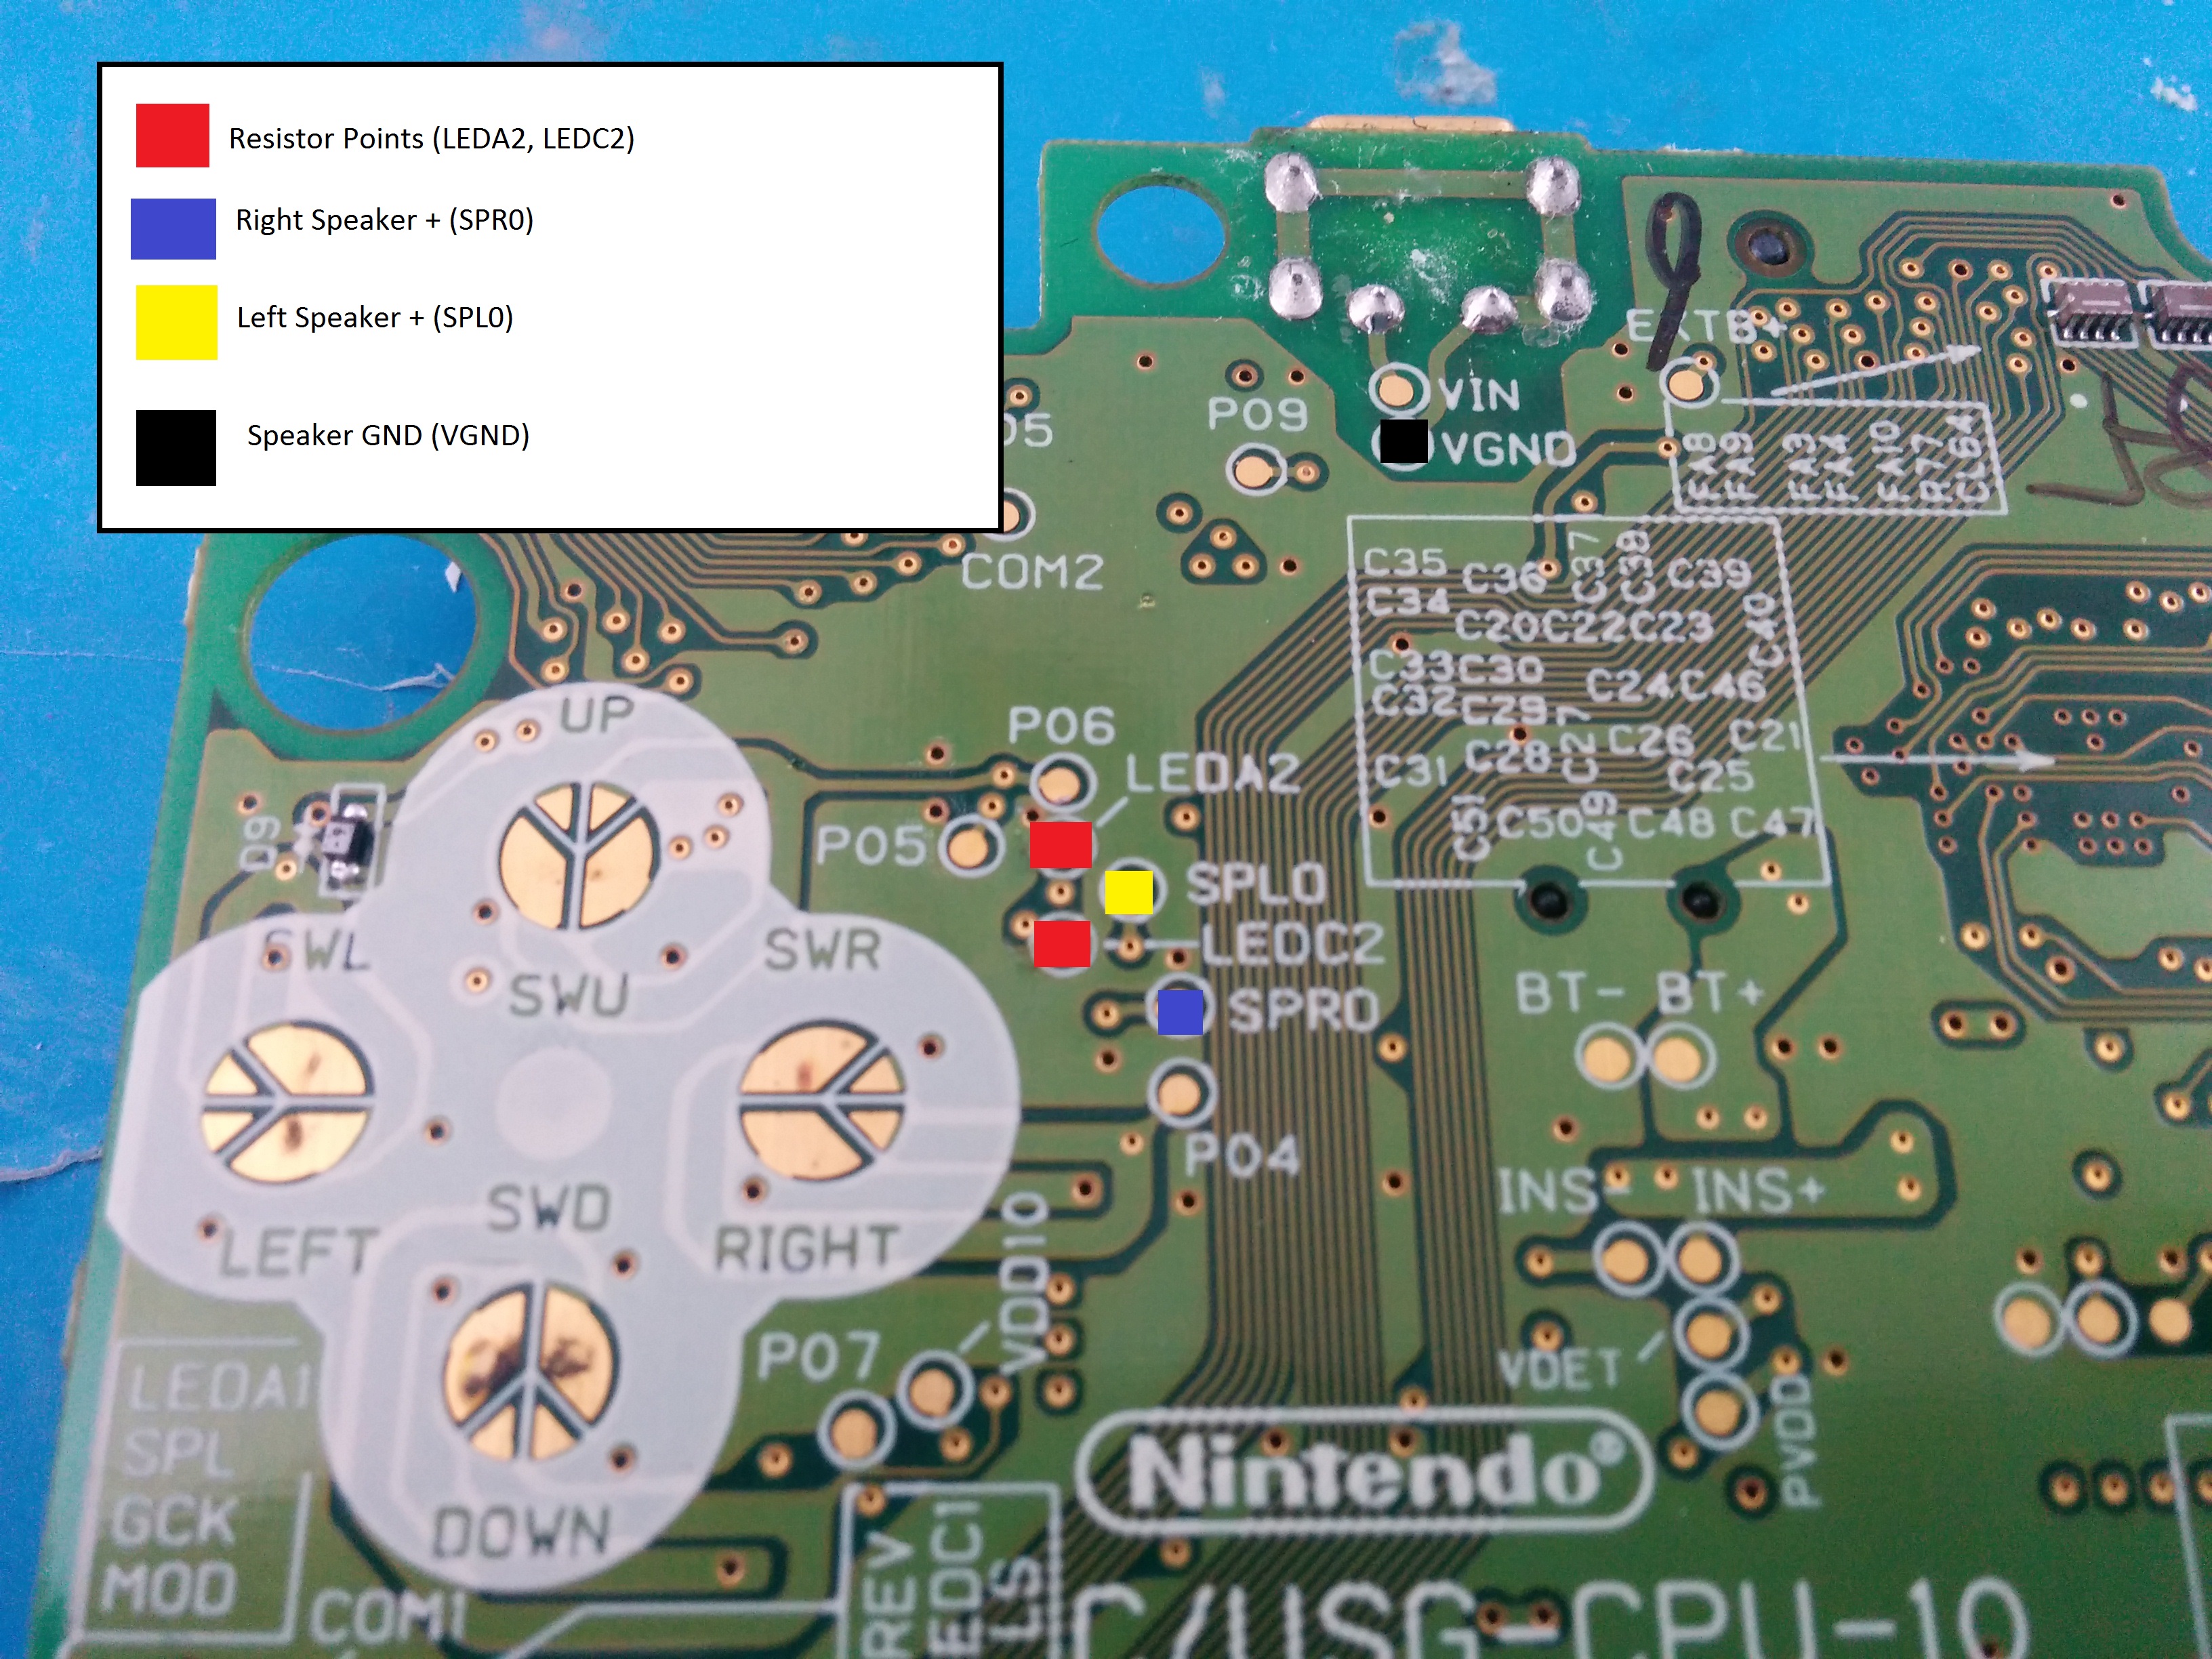
I have found that the easiest way to install these resistors is to first pool solder on the points (see below), then use a pair of tweezers to hold it to the points while heating the pool of solder. The resistor will lower to the point then you can solder the next point.
-

- There is some double sided tape holding the right side of the bios module down, so it will be slightly tough to remove

-

- It should look something like this.
You can test it if you’d like, but it should work now.
Step 3 – Getting the speakers
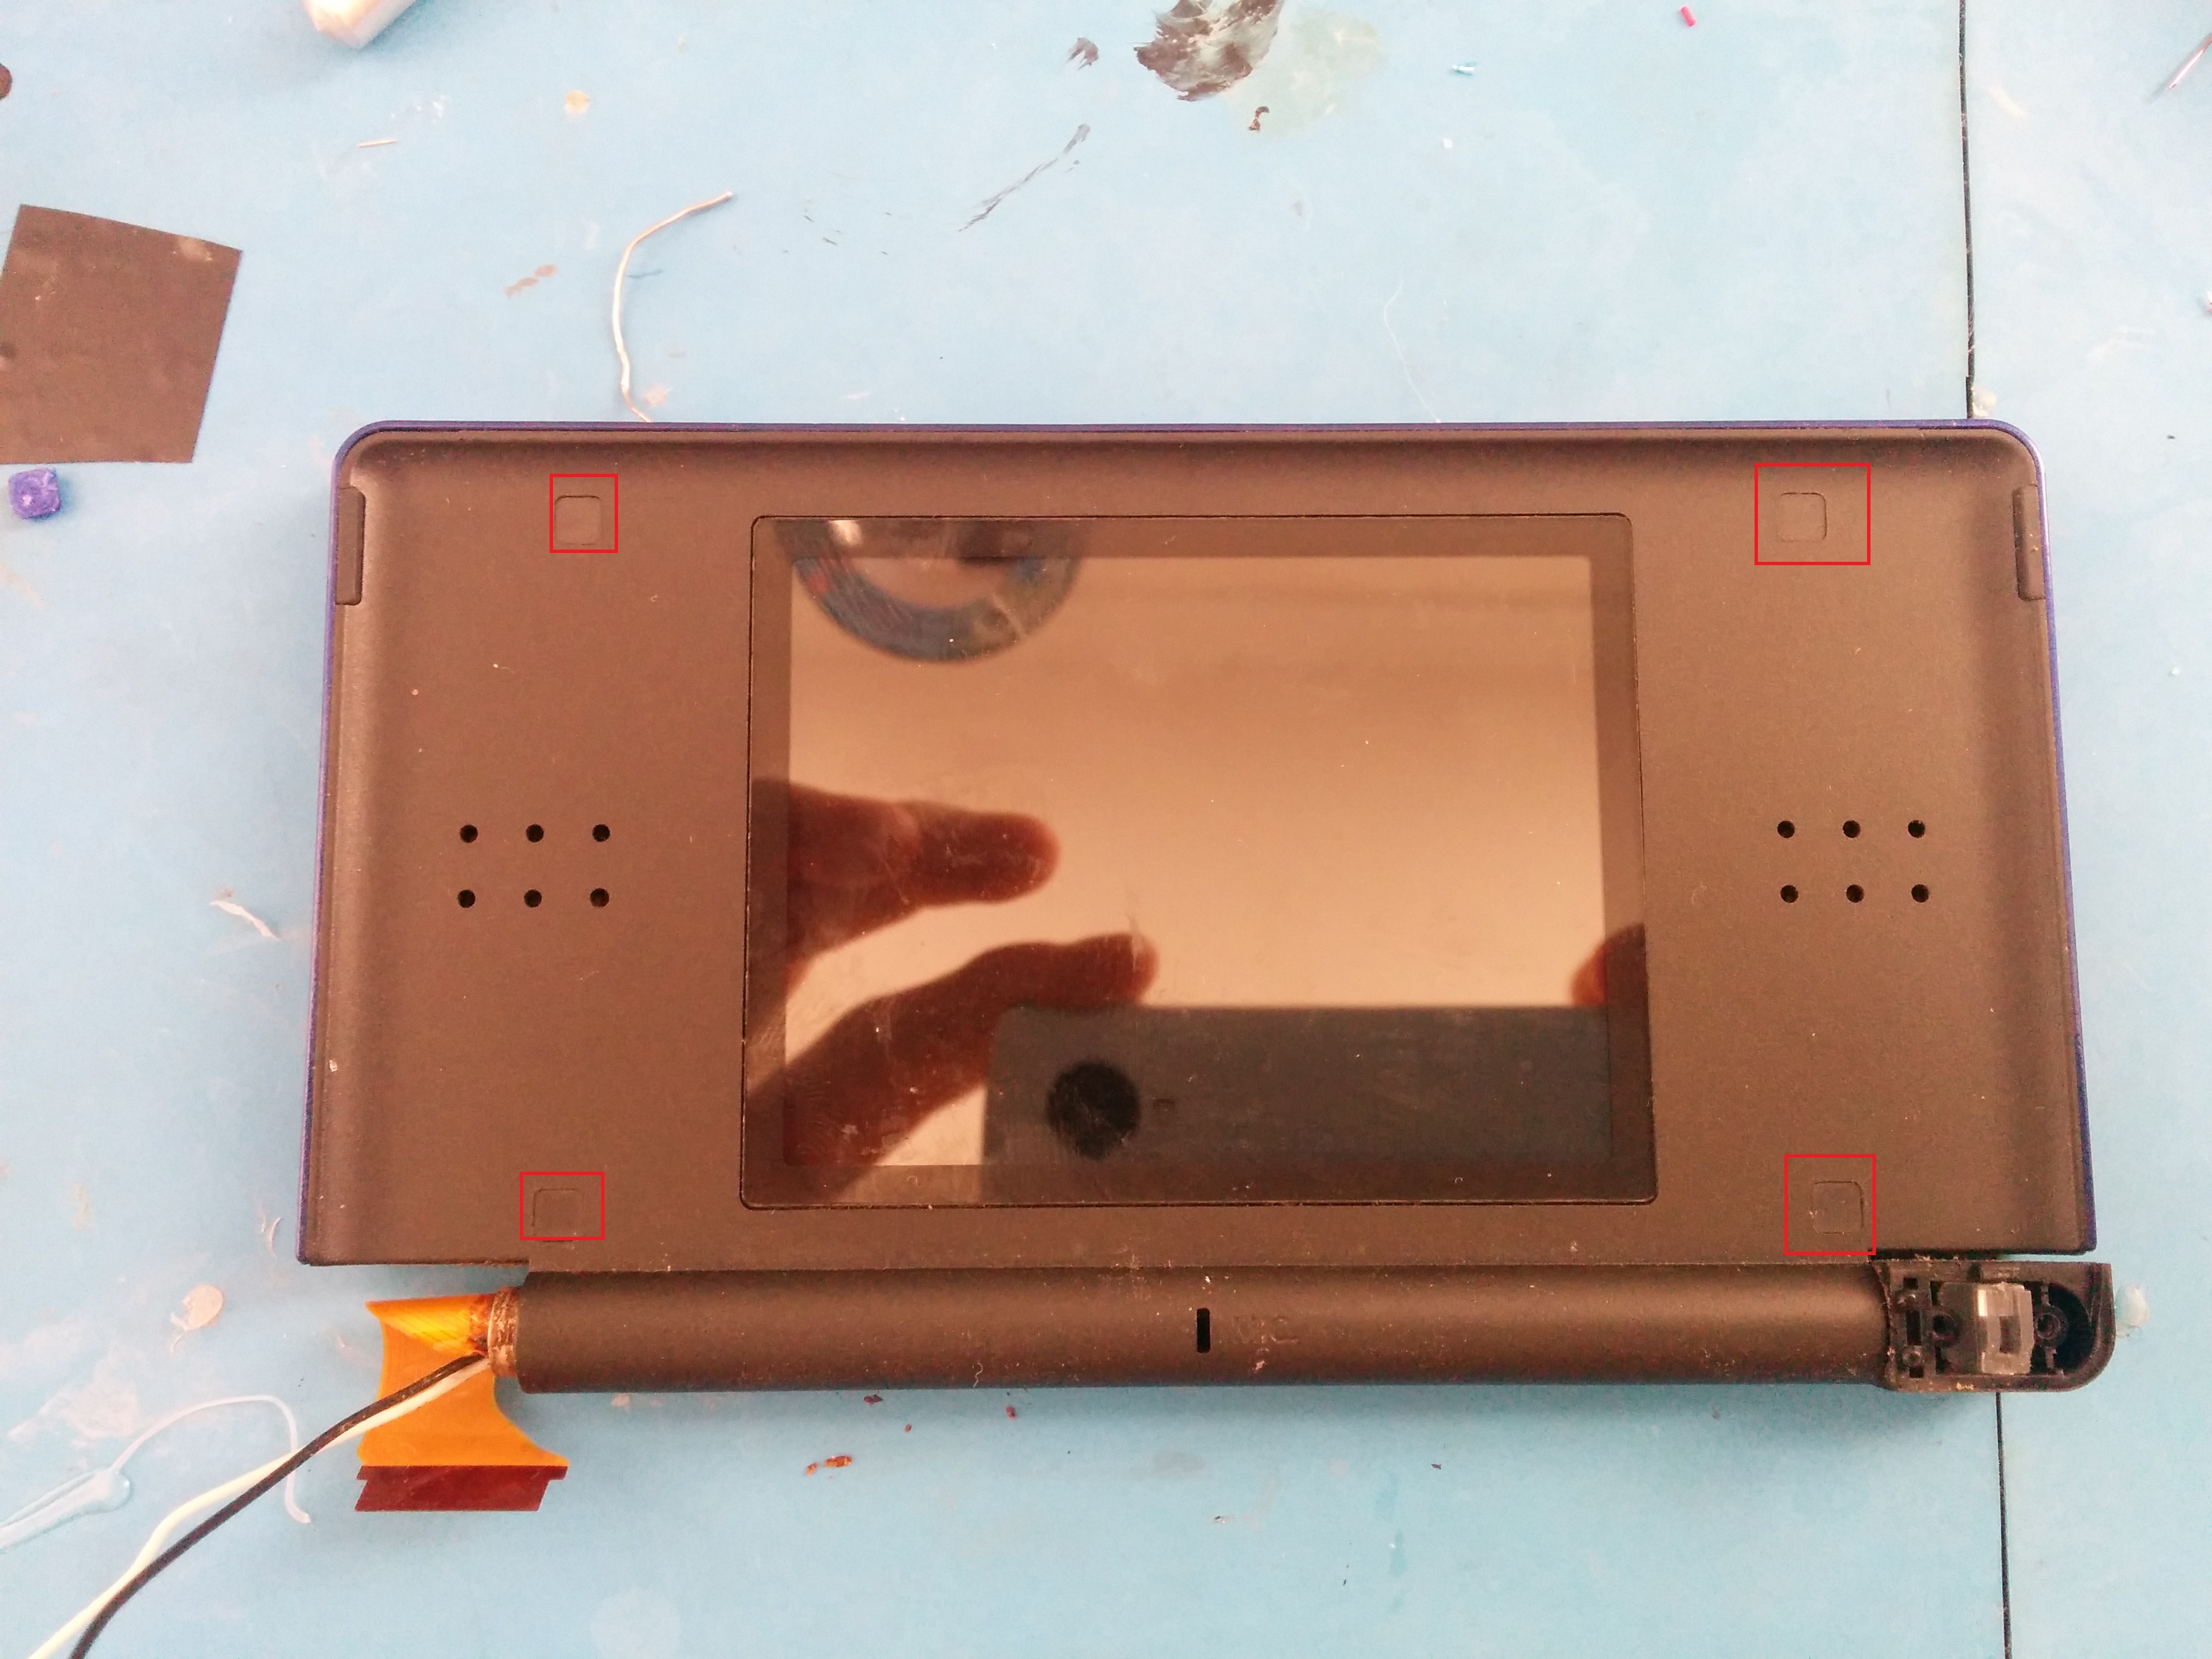
Now it’s time to get the speakers. Get the top screen and remove the covers marked in red. Then remove the screws under them.
Now you need to flip it over, and pry the back off. Just do the same as you did on the case and slowly work around. I usually start at the hinge since that’s easy to separate. Once it’s open you should see something like this.

You’ll need to remove the ribbon cable holding the screen in. You can either cut it, or roll it up and slip it through the metal ring.

Once it’s out, push the screen out from the front of the case (just push against the plastic), and it will come out, speakers and all. Then desolder one or both sets of speakers marked below.
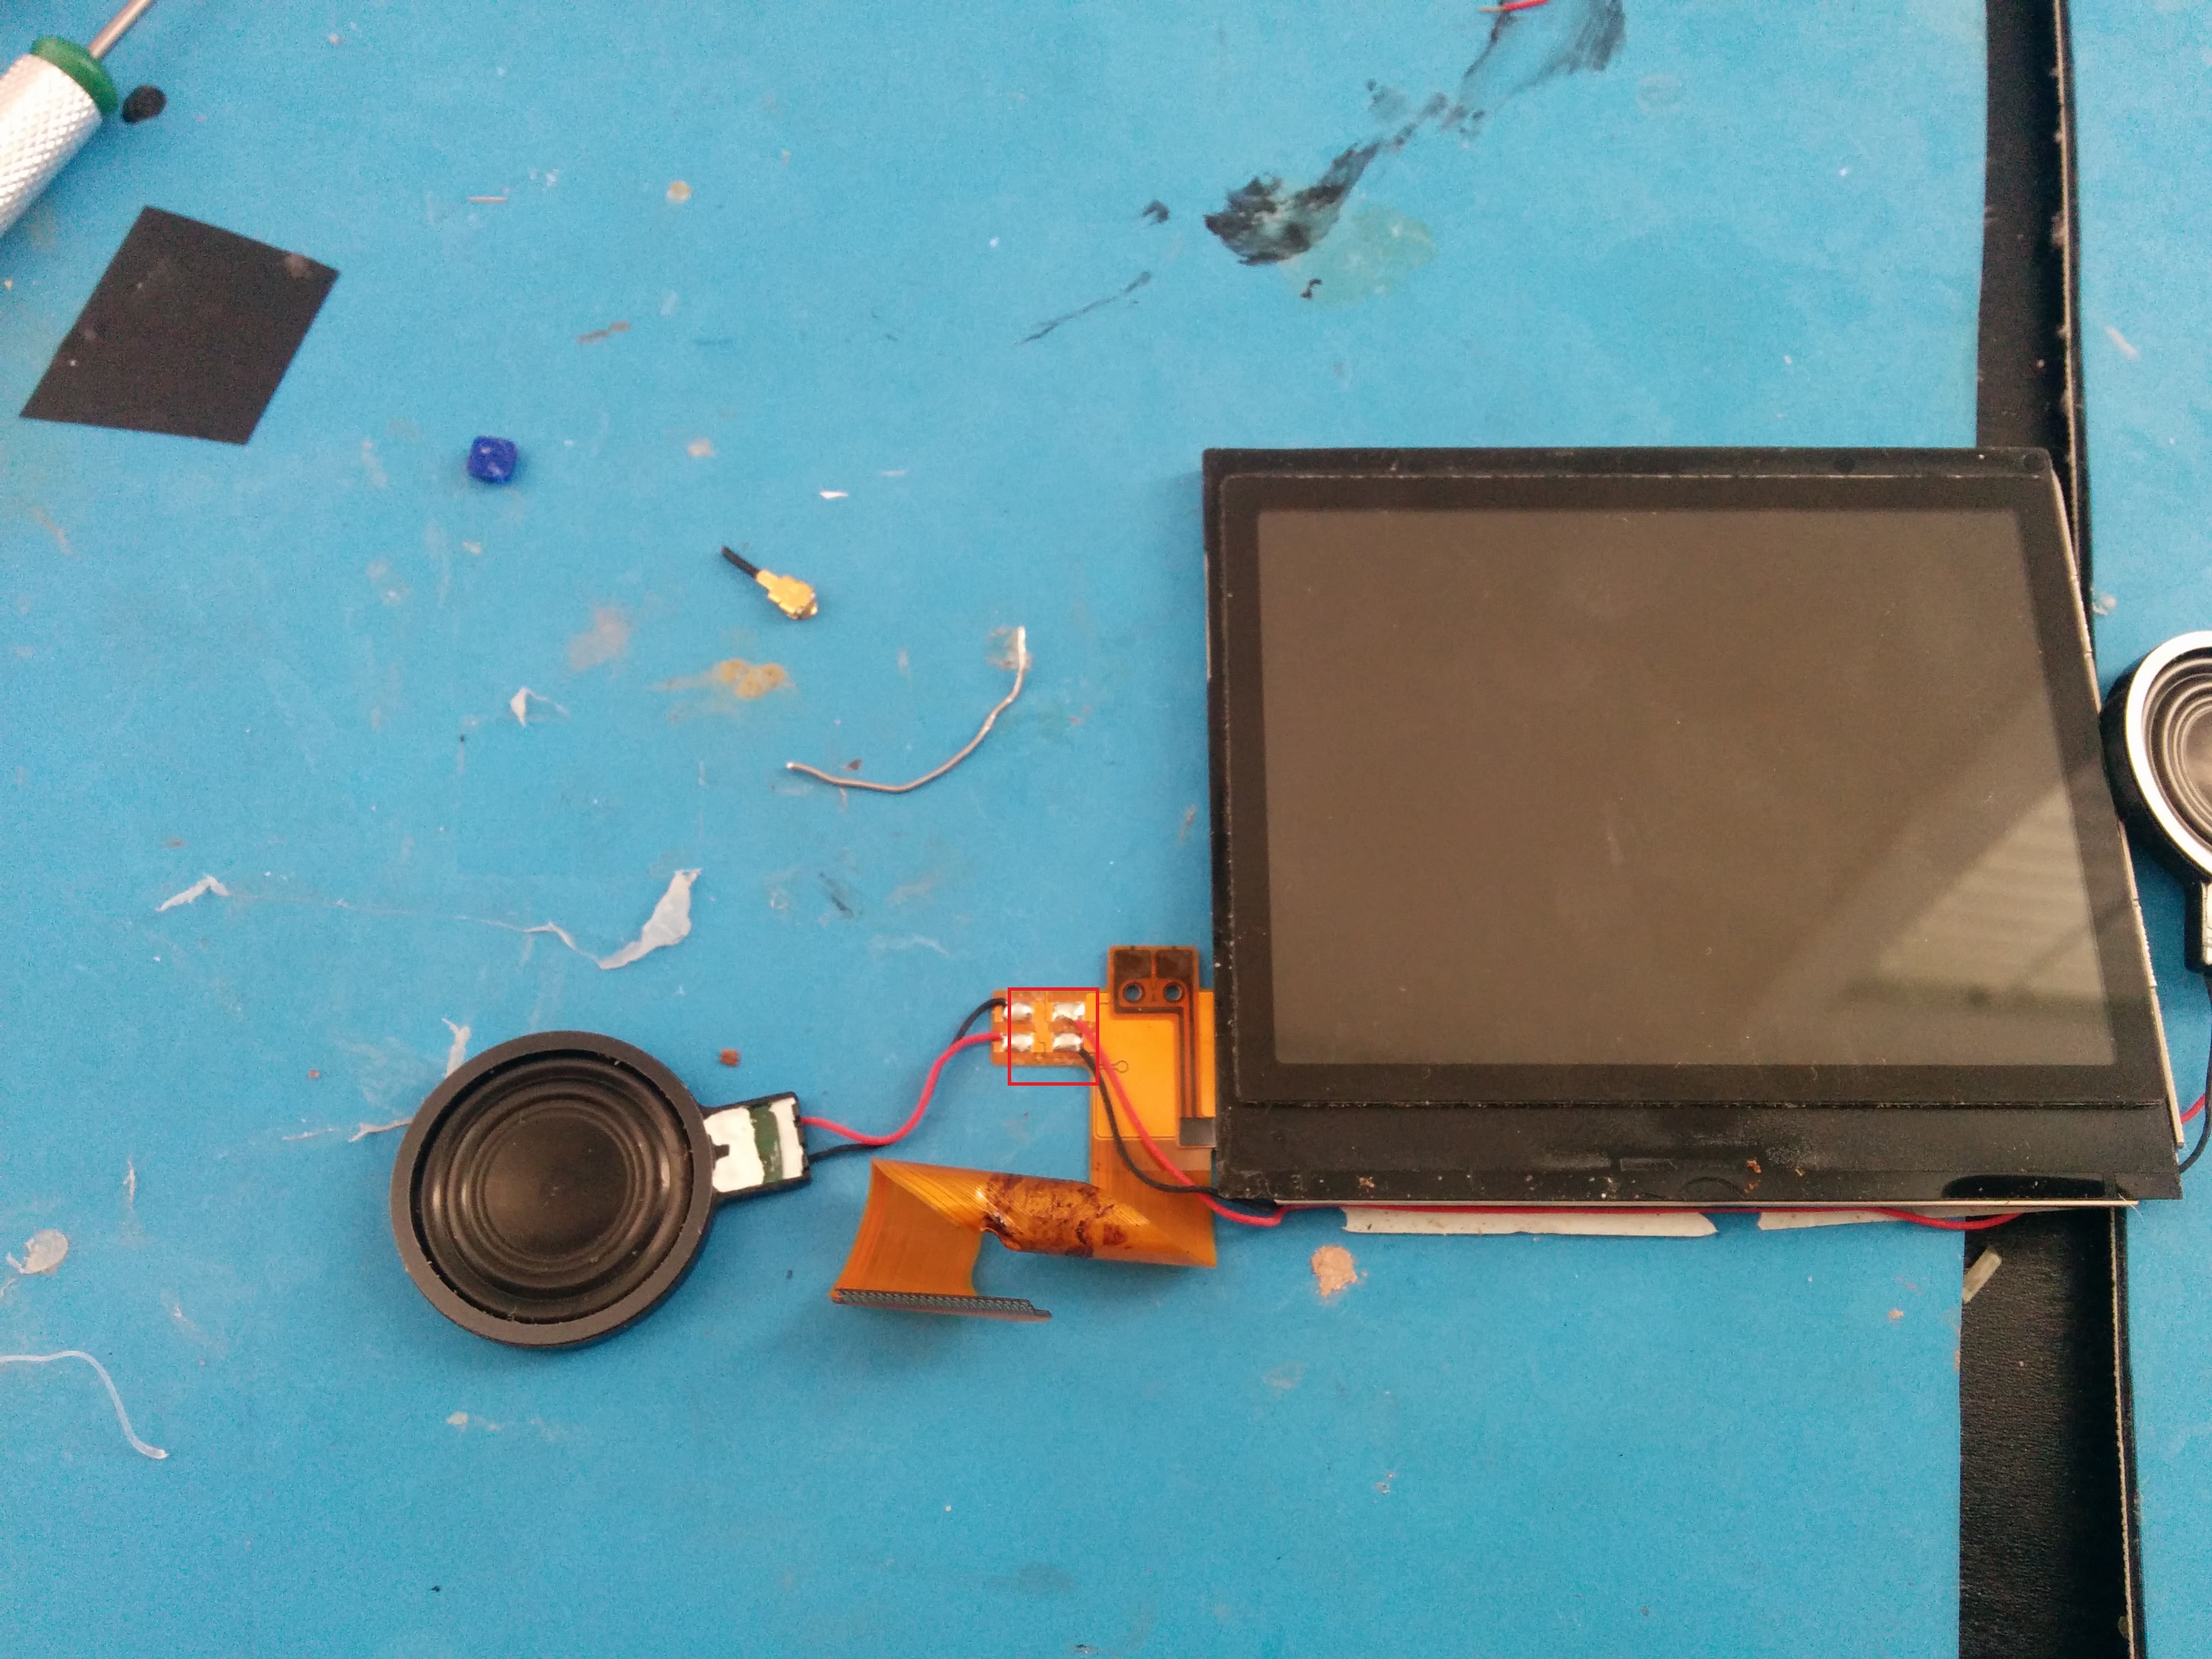
Next cut two strands of kynar wire (maybe four inches in length, you can always trim it later) and solder it to the connectors on the speaker.
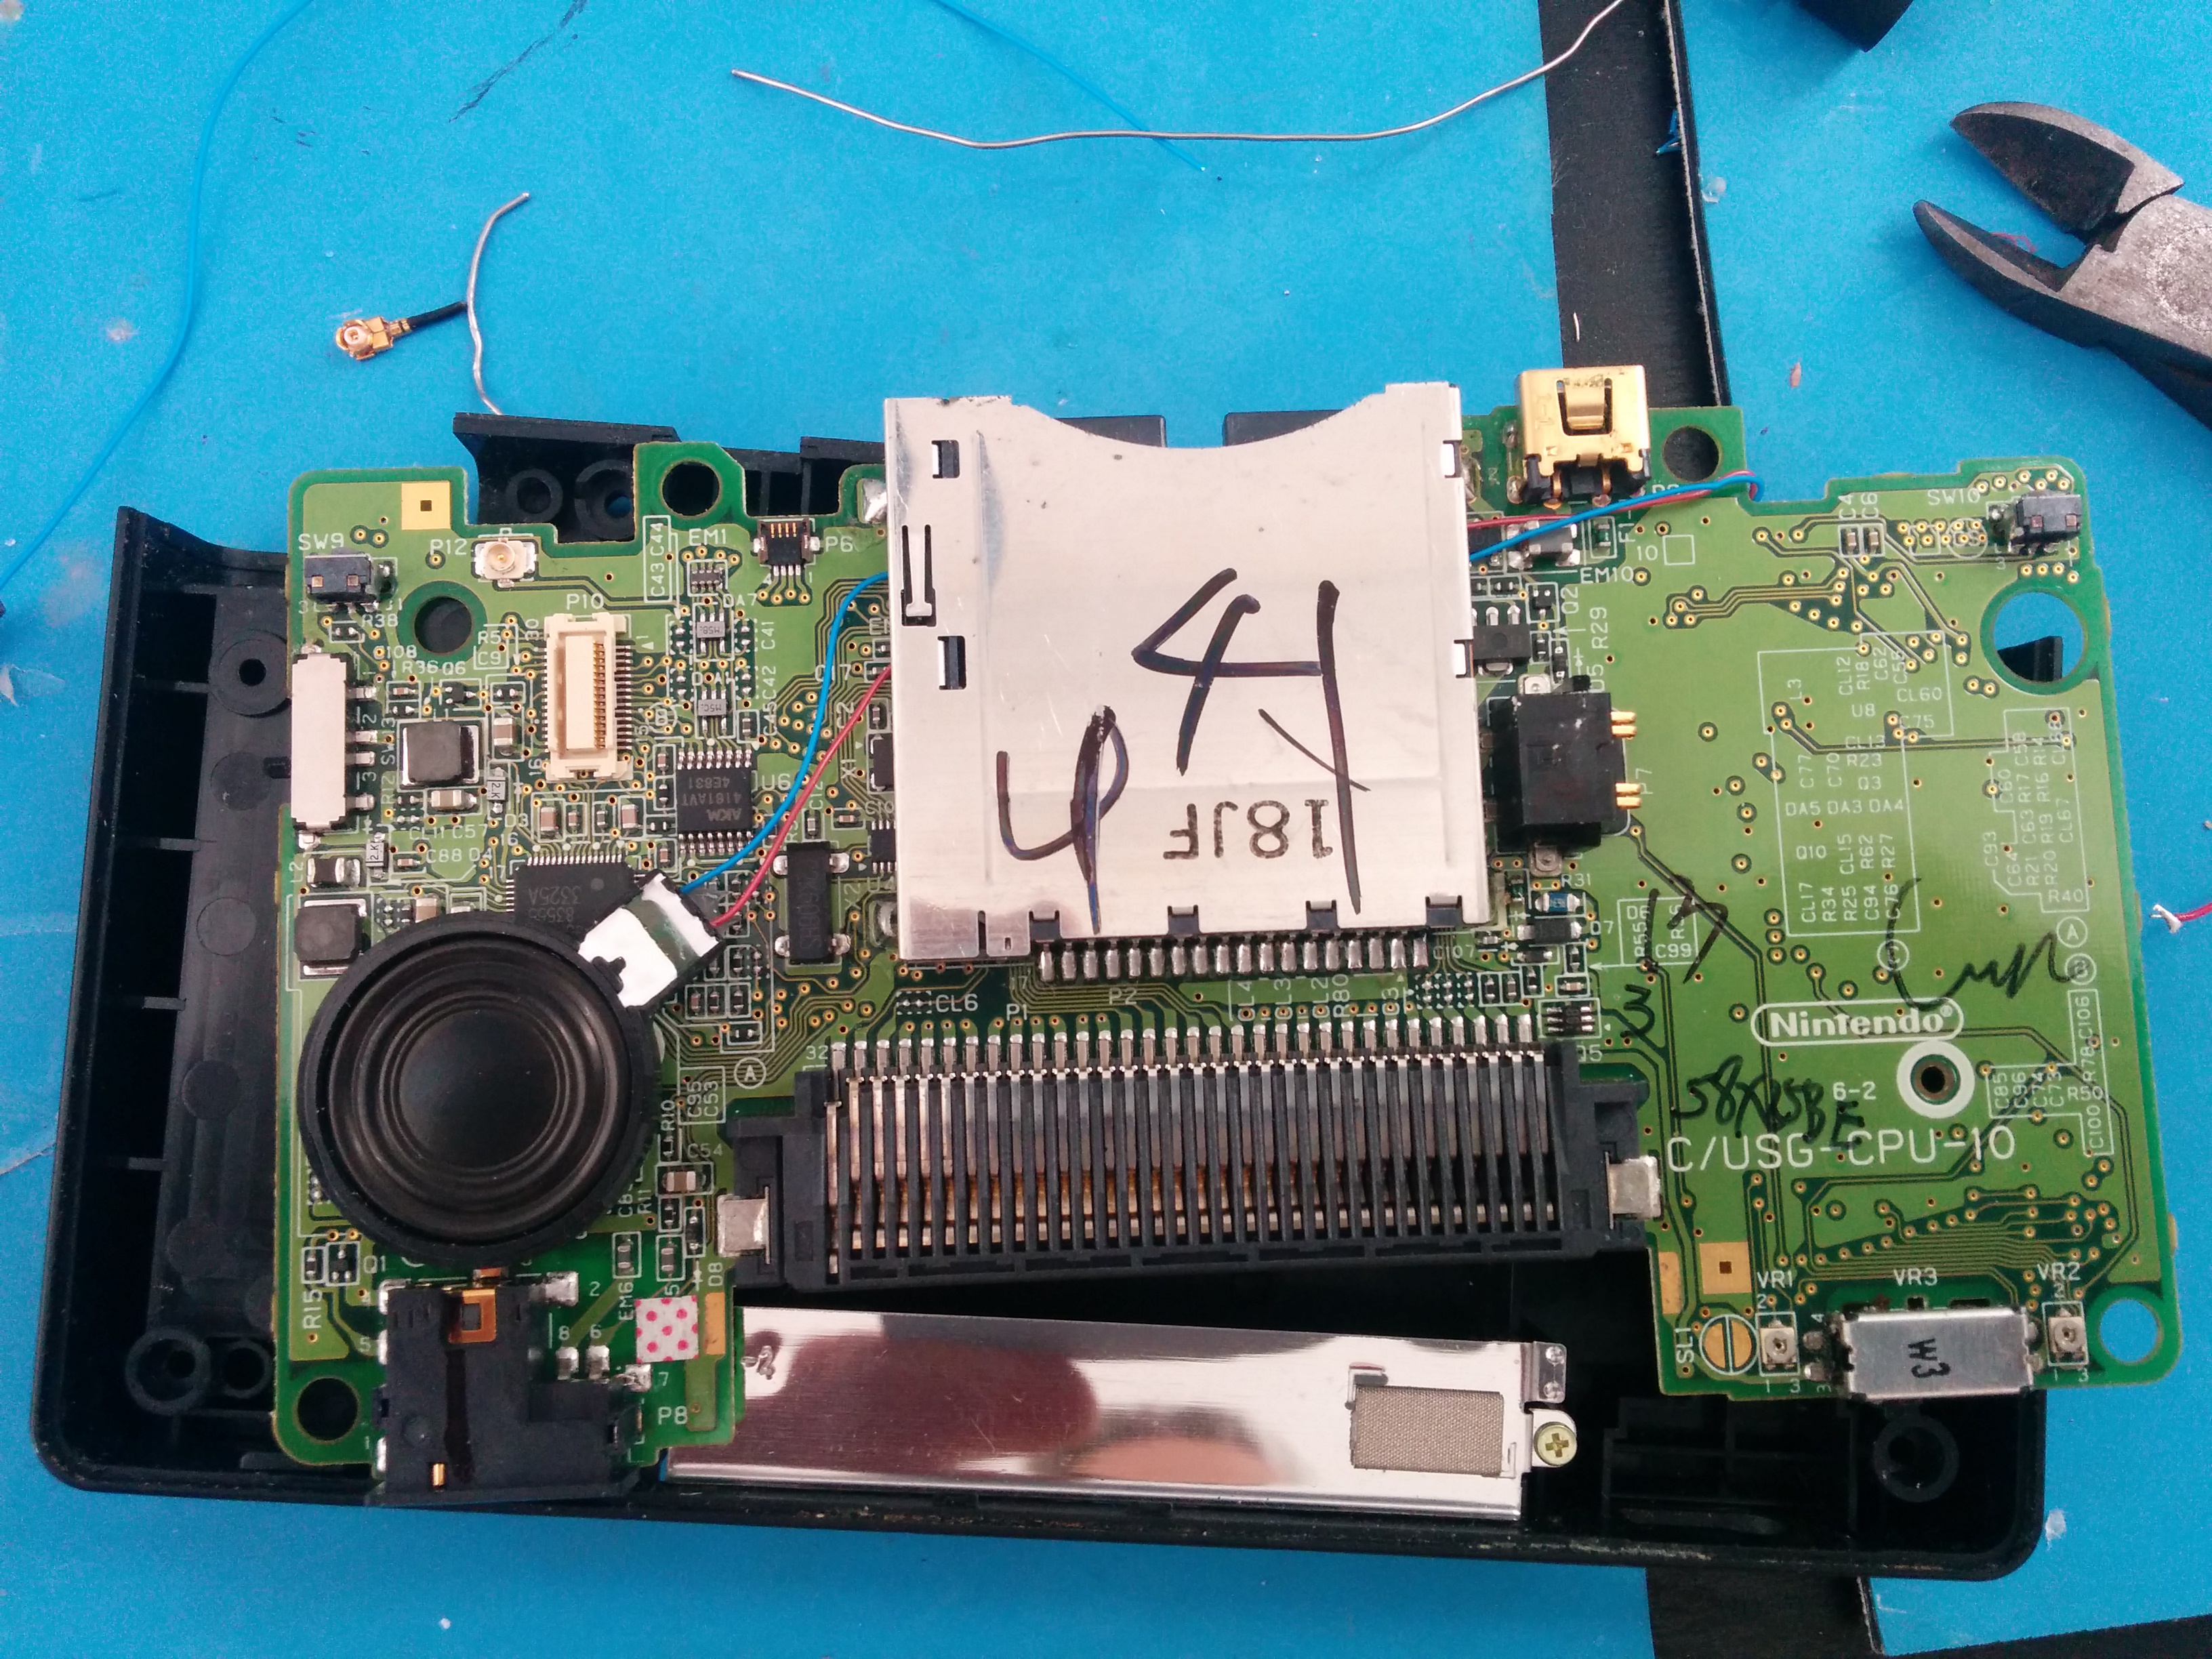
Return to the motherboard and flip it over. Run the speaker wire under the DS slot like so. Just let the speaker magnetize to the motherboard for now. You will need to remove it to screw the motherboard into your case after you finish your mod. Once it’s screwed in you can glue the speaker down.
Next, flip the motherboard over and solder the speakers to the points marked below. This tutorial will only include the right speaker. But if you want to use the left as well, solder it to the point referenced.
- Right = SPR0
- Left = SPL0
- Ground = VGND
-

- It should look something like this.


Now you can hook the battery up, plug the screen in and test it!

